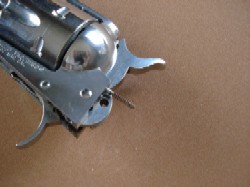
This is the proper orientation of your hammer strut.
 |
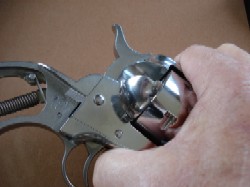
This shows your hammer strut installed with the round end in the slot at the base of the hammer. |
 |
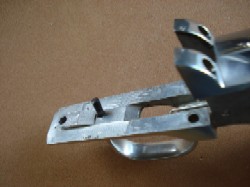
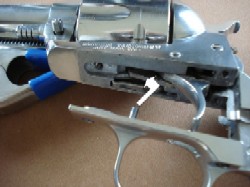
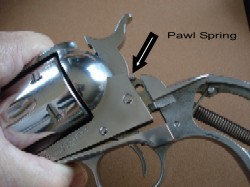
Next install your pawl spring with the plunger in the hole first. This is the smaller of the two springs you removed. |
 |
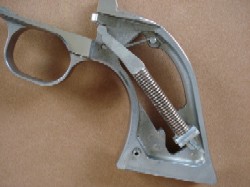
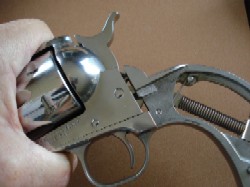
Now install your cylinder bolt latch spring with the spring end in the hole first. This is the larger of the two springs you removed. |
 |
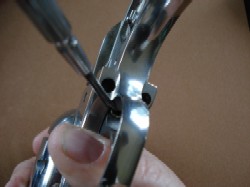
This shows how the bolt latch spring must contact the bolt latch when sliding your grip frame back on. |
 |
Now slide your frame onto the gun. Remember to see that the little pawl spring up by the hammer is pushed into it's hole and not sticking out the side of the frame. |
 |
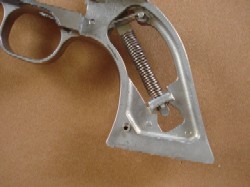
You now have the frame on the gun but this is as far as it will go. This is because the trigger spring is holding it back. |
 |
This angle shows you the trigger return spring that is holding things up. |
 |
Just take a small screw driver and push the spring down and it will go into it's notch in the back of the trigger allowing the grip frame to slide into place. |
 |
Now that you have the frame on the gun, before you put the screws back in, this is a good time to open the loading gate and turn the cylinder. If you've installed the bolt latch spring correctly you will hear the clicks as you rotate the cylinder. Close the gate and the cylinder should lock into place. You can now install your screws. It makes no difference what order you do this in. Bring your hammer back to full cock and remove the pin or paper clip from the hole in the hammer strut and you're good to go. |
|
CLICK HERE TO GO BACK TO REMOVAL INSTRUCTIONS |